Showing posts with label DIY. Show all posts

Jun 12, 2020

Two finished projects

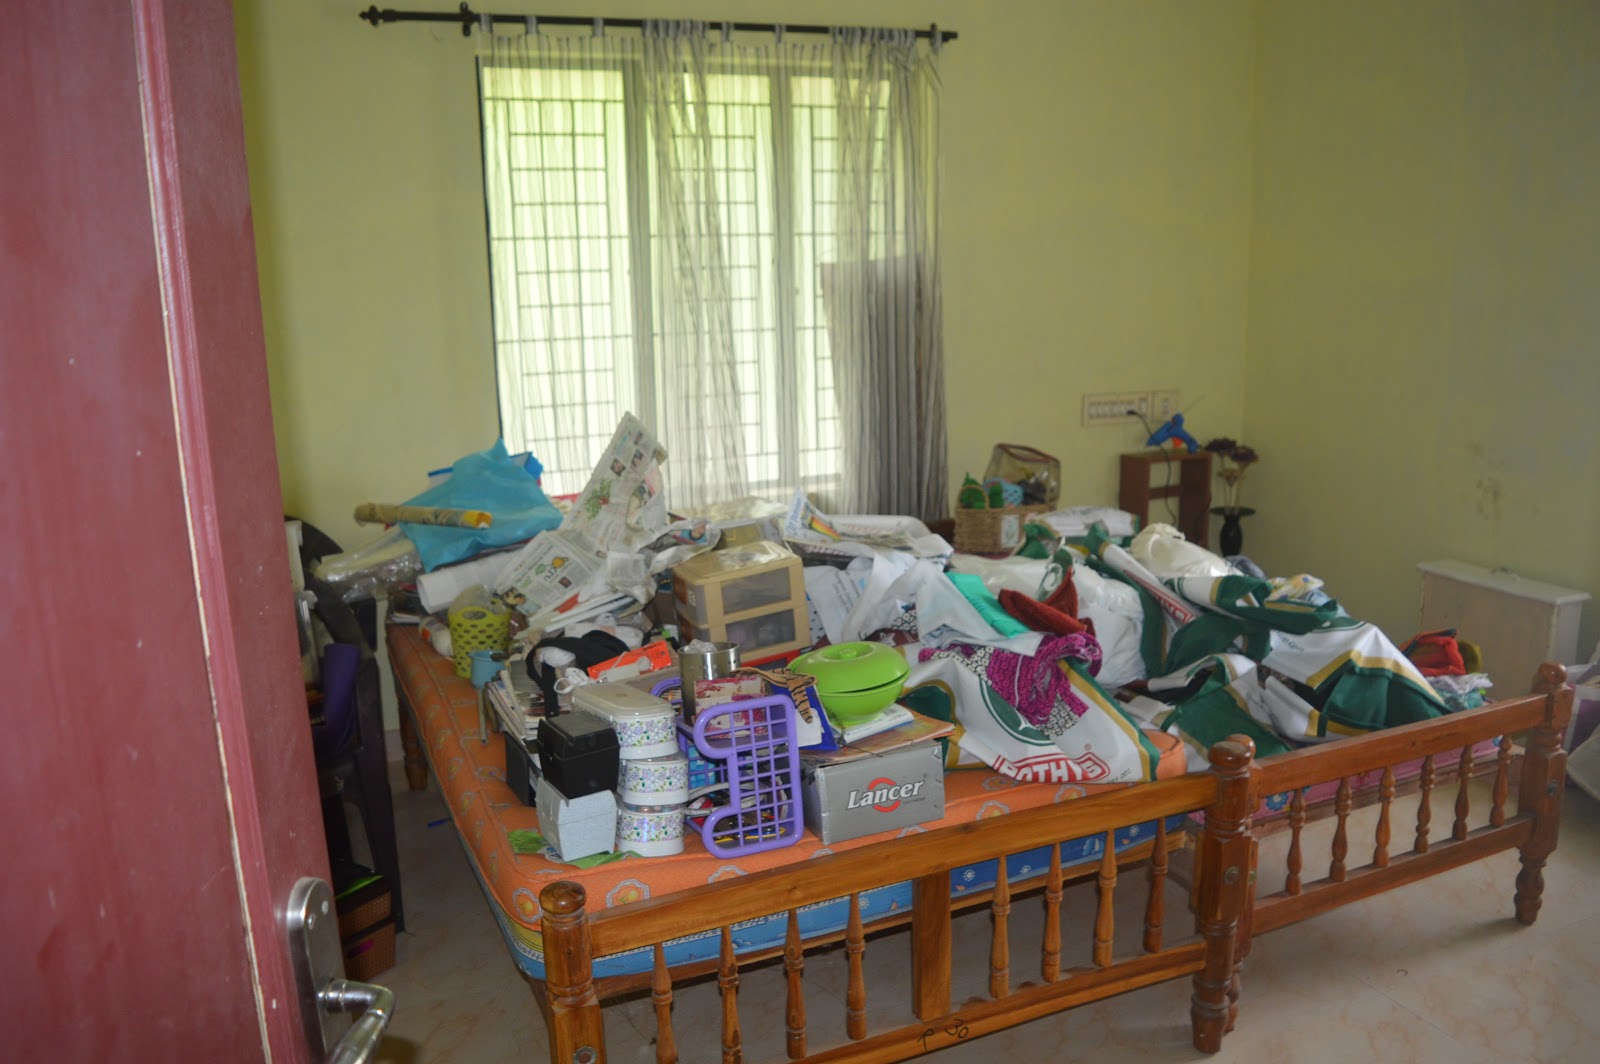
The past two weeks at Karthi have been busy with the kiddos returning to some semblance of schooling. The end of May and beginning of June saw us scrambling to get electronic devices suited for both to attend either live classes via Microsoft Teams (elder) or recorded classes via the school website (younger). Naturally, we have cut down TV time to after 7 pm and Prime only on the weekends, just like school time. What with the transition and new routines to plan and implement, my creative output suffered. But this week I got back in the groove.

Back in February, I had written about a tapestry crochet bag that I was making. The original design was for a tote that had handles that wouldn't take any weight. So I changed my project into a backpack, but found myself in uncharted waters. I had to create a flap, sturdy straps, affix these correctly to the body, attach a magnetic clasp, make a lining, and make pockets for the lining. I was in creative overwhelm. The new things needed a lot of fermentation time in my head, so I put the project aside and completed a crochet scarf and made a few masks. 

Proceeding in baby steps, I first found a very sturdy, double-layered crochet stitch for the straps. I made a smaller version for a loop that would serve to hang up the bag, then attached them to a crocheted rectangle and then sewed and crocheted the whole on to the back of the bag. 


Once that was done, I turned my attention to the flap, which I needed to taper to a point. Crocheted a few rows each day, gave it a contrasting border and and ta da!


Next, I hunted up a salvaged magnetic clasp from a dilapidated wallet and attached them with the help of some denim fabric because I didn't want to attach the prongs to the crocheted part.


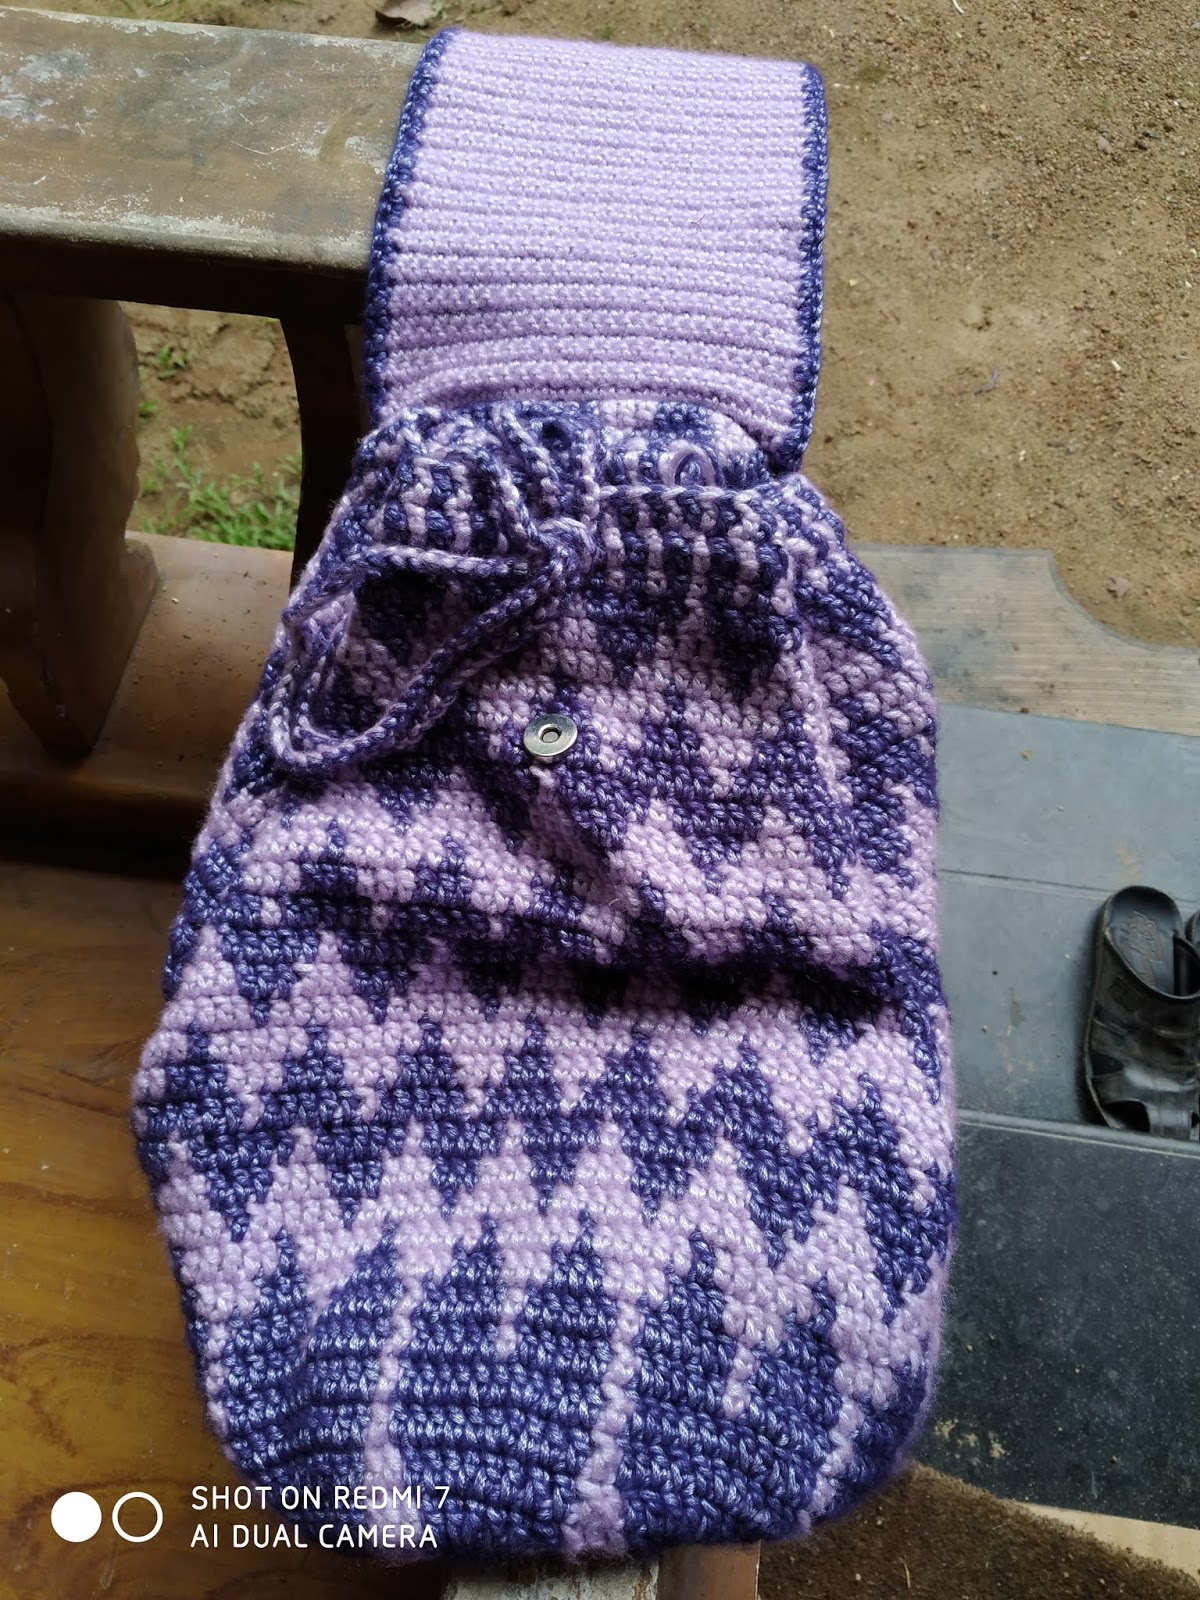
The sewing of the denim patch on the flap wasn't as straight as I would have liked it to be as you can see from the picture below, but hey, I am a recovering perfectionist and the job was neat enough. The opening is of course the drawstring that I designed by myself. 


Finally, I found a length of cotton in my stash that had complementary colors and sewed the seams before hand-stitching it to the bag. For the pockets, I used the back pockets of a soft, stretchy jeans that I had massacred to make masks. 


And here is the bag with some books in it for ballast, on Ani's shoulder.


On the whole, not a bad job for a first-time bag-maker, hey? 

When I was finished with mask- and pocket-making from my old pair of jeans, the only part left was the waist band and the front pockets. So I made this...


My "house uniform" of salwar-kameez has a great drawback. It doesn't have pockets. At Karthi, you can often hear me requesting people to find my phone, because I leave it all over the house. This "belt", worn over my salwar, now keeps my phone near me all the time. The only problem is that my brain has not yet registered that this is my phone's new home. Yesterday, someone called as I was cooking and I searched the whole kitchen for my phone without realizing that it was safely ensconced in my pocket! 

As for our garden and yard, the monsoon rains have brought out the grass and weeds in full force. I have been subduing them with my weed-trimmer. I hated the thought of taking out my trimmer, because it has a bad habit of flooding very often. I always followed the correct procedure, using the choke sparingly. But after a couple of sessions, it would flood and respond to no amount of persuasion. Earlier, this meant a 30-km drive to the nearest Stihl service center to get it firing again. This month, determined to fix it myself, I searched and found a YouTube video and learned how to do it. If air was solid, it would have had several holes in it from all the punching I did the day I restarted the flooded engine by myself! So now the grass will not get a chance to grow higher than a couple of inches around our home. 

In pandemic-related news, each Saturday when we go out shopping, we find more and more people out on the streets, mostly wearing masks and giving wide berths to each other. But things are more lackadaisical closer to home, with neighborhood boys playing together outside and even elderly people wandering around without masks at our nearest junction. At Karthi, we are still in full vigilant mode. The kids have been so understanding of conditions and have adjusted much better to the lockdown than I had ever expected. That is something that I am very grateful for. DH did go to the office a couple of times to see what it was like. But he missed the hot tea and snacks that I provide at his table even if he is in conf calls. Both days he came back home hungry and crabby! So for now, he prefers working from home. 

That's all from Karthi for the time being. See y'all next week!

Mar 9, 2018

Post laptopitis and a makeover project...

January 29th was an ordinary Monday in all other respects at Karthi. After the weekend merrymaking, I was as usual torn between selecting an extended rest on the couch or whirling around Karthi putting to it rights after the weekend mayhem. I had no inkling of the disaster that was to befall me. 

In the end, I chose to celebrate the fledgling week by alternating between bouts of cleaning and sitting still. In one leg of the sitting still part, I fired up my trusty laptop of 7 years, did some work on it and left it on the blink a while later to get my lunch. After lunch I came back to my hibernating computer, sat down and pressed the switch...

Nothing happened. The screen didn't erupt happily to life on my touch. No friendly lights gleamed. I quickly attached the power cord and tried all resuscitation methods that my laptop technician relayed to me over the phone. No good. That is when I started to realize that something very serious had happened...

To cut a long story short, my laptop is still not completely fine. It was resuscitated and returned to me after more than a month minus a battery for the backing up of files. It needs another extended stay in the hospital for a complete recovery and I'm waiting for the technician to arrange a surrogate laptop for me to use till my own is returned to robust health. 

But the first two months of the year have not passed by uneventfully. Today I will share with you a project that had been niggling at me for several months. It was concerning this bookshelf in our master bedroom:


I have no idea how old this bookshelf is. From 3rd grade to the 5th, it had been part of my room in Saudi. Later, it sat in my sister's room for a long time. When our parents came to Thiruvananthapuram, they left it here at Karthi. My father had got the old plywood panel covering changed, put in new glass sliding panels and had the interior painted. But the glass didn't slide smoothly, it was a headache to open and close them and they were tough to keep clean of smudges and dust. So over the years, I was unable to close them properly and the interior got progressively dirty.

Things being so, I just stashed in some things that weren't in frequent use and had to spend considerable time and effort in retrieving them. It was tough to keep it organized and clean. Besides, it was the first thing that met my eyes on waking up and the last when I went to sleep, so it was kind of an eyesore too. 

One day I just paused by it and checked one end of the glass channel that didn't quite meet at one corner. To my surprise, it came off from the wood, trailing threads of tacky glue. I ran to my tool box, found a chisel and in no time had pried off the channel on the left side!!! I sat down to think and found that an open bookshelf would be much more easier to maintain and organize than this sliding glass affair. 

So in the second week of the new year, I bought some white enamel paint (since my painting adventure last year, I consider myself a veteran house painter) and happily dismantled the glass channels and panel without any damage.


It was a challenge taking out the glass panels and the top and bottom channels. I didn't know how to take the glass out of the channels without removing them altogether. So after a bit of sliding and prying that saw me sweating as much in stress as in exertion, they came out without breaking and I immediately packed them up and put them away for safekeeping. 

Two coats of paint later, the bookshelf gleamed back at me... Of course, the edges are a bit ragged and the paint has got out of the lines a bit, but they don't bother me.


And here it is now... organized and easy to clean, no longer an eyesore and completely usable.


So that is another project under my belt. Each time I look at it, I smile in satisfaction! Which reminds me, I have not shown you my living room makeover yet. Will post it soon!!!

Jul 14, 2017

My Craft Room: Before and After

Let me dive right in:

Here is what my craft room looked like at the end of March


The builders left the walls painted in wall primer tinted a greenish yellow that showed the cement color behind the walls. It looked much worse than this photo.


One of the first things I did was to shift all my craft things and furniture to the next room. Please be warned, the mess is likely to startle and horrify! :D


Most of my stuff was pretty organized, but mostly in big, labelled totes that looked untidy on the shelves. After the laborious, multiple-coat woodwork painting, I first painted the walls with leftover white paint. And left a taped rectangle on one wall...


Why? I'll show you in a bit! 

So here is my craft room AFTER the painting! 


Tadaaaa!


That's my sewing machine on an old computer table on the left. And can you see why I taped that rectangle off? One coat of special paint transformed it into a blackboard where I can draw or write as the fancy takes me!


Of course I have a white board too...  one can never have too many boards!!!

What's that, you want to see how the cupboards are organized? Are you sure? Ok, here goes... Let me open the cupboard on the left...


I don't know how long this state of affairs is likely to last, viz., the super organized look. But at least I will know where to look to find everything. The rotating spice rack on the middle shelf came with me from Houston and sat gathering dust in my kitchen cupboard for a long time because, let's face it, we Indians do not use dinky amounts of spice in our curries and refilling the tiny plastic bottles was a huge chore. So now they hold my beads! 

And yes, those are recycled and reinforced shoe boxes on the top shelves. In fact the whole row of shelving on the top contain lots of cardboard boxes. I can never bring myself to throw them away. As you can see, they can come in very, very handy!

Here are the drawers beneath:


They hold my cotton yarns and threads of different weights. 

Let's see the cupboard on the right:


Those are my craft books on the top, they are two layers deep. The two shelves below them are full of jewelry findings as well as finished pieces. The right side of the cupboard is devoted to paper goods. Can you see Shamu there, guarding my paper goods? He's been with me from the time we visited Sea World in San Antonio back in 2003. 

One drawer below this cupboard is filled with craft paints and varnishes:


I have left the right drawer empty and the two large bottom drawers have extra boxes, an iron etc.

It's true what the decorators say, "A coat of paint can transform a room". I can feel the change in the energy when I go there to make things now. On my  wish list - material to make some nice curtains and a comfy upholstered chair on which I can put up my feet and crochet to my heart's content. I'll be getting the first soon and sewing up some cafe style curtains. Our downstairs sofa will have to make do for the time being for the second item! 


Jul 6, 2017

Lessons from Painting a Room

I've always wanted to paint a room by myself. I used to tell DH that whenever we had a home of our own, I wanted to paint it - at least the inside of the house - I had no plans to dangle precariously over the exteriors of our home. DH waited for 7 years after building Karthi to see if I gathered any momentum in the house-painting direction. Then he gave the job of painting our living quarters downstairs to a set of professional painters who broke all their assurances of being least disruptive and of finishing within the stipulated time. In the end, they made a slapdash job of it in the last areas they painted.

So the chances of getting my craft room upstairs painted properly any time soon diminished. But I had been watching the painters, studying their technique and materials at first hand and gained valuable lessons from them. I slowly began gathering supplies once a few months. This summer vacation, I decided to take the plunge. And here are some lessons that I have learned in the past 3 months that it took me to complete one room!!!

1. It's not as glam as it looks: My room-painting ambitions were fueled by many pretty pictures of people doing this effortlessly... Have you seen the song "Kinavile janaalakal" in the movie Pranchiyettan and the Saint? The character Padmashree dons a pretty bandanna , ...


... wields a wicked paint scraper in her perfectly French manicured fingers, ... 


... and rocks the painting scene in her designer outfit


Meanwhile in reality, it looked like this...


Yup, that's me, up on my stepladder, please feel free to laugh to your heart's content. You will notice that my hair is completely UNDER my bandanna, I am wearing my oldest house clothes with long sleeves and an apron over it (I've had to discard two dresses and aprons because they were not fit to be worn again) and also a towel over my nose to keep the nasty fumes out. 


I am also wearing a pair of my favorite knit cotton gloves to protect my hands. Thank goodness I chose to model my attire on that of the professional painters rather than a movie star!!! :)

And movies get so many things wrong at so many levels... which leads me to my next lesson...

2. Going from dark to light is very, very tough


The painters in the movie could never have got the immaculate white wall that they are shown to have got that afternoon if this was the wall that they had to work with. I found that out when I tried to turn my mahogany brown door and frame to white. It took me at least four coats of white enamel paint to get it to look at least a creamy white. And I stopped at that. The beige built-ins took three coats too. Thus the woodwork took a huge chunk of time to complete.

3.  Buy paint from paint stores: When I ran out of my initial supply of white enamel paint, I ran to a small local hardware store and made sure to buy the same brand and type of paint. When I opened it, there was a pool of brownish liquid on the top. I mixed it thoroughly according to instructions and it looked somewhat okay in the can. It was only after I painted that whole top set of cupboard doors twice with the same paint and compared it with the others that I realized that the color was so off.

That was when I checked the date on the paint can and it was more than two years old. The bottom was slightly rusted. Busy paint stores have a lot of sales and seldom have old paint in their stock. But a hardware store might have old stock. I should have been suspicious about the discount the shopkeeper gave me.

I must also say that acrylic emulsion paint doesn't seem to go bad this way. We had some white emulsion paint left over from 2015 and it did very well to give my walls a first coat once I strained off some impurities that had got in the paint bucket. Reusing that paint saved me a lot of money this time over.

I didn't bother to go over the two discolored coats... I decided that I would let it stand as a lesson to myself to be more careful in the future.

4. It doesn't do to hurry or work against a tight deadline: I had planned out the painting meticulously. I would spend an hour or two each day in painting the room with Kunjunni's help. That way we could complete the work within two months' time. But a hectic and physically taxing journey had me bedridden with flu for two weeks in May. I bounded back to my project as soon as I could get up without feeling woozy, but found that I could not stand the fumes for a week longer.

When I got back to work, there was just a week more to the school reopening after which I wouldn't have company to do the work. One day I worked almost 6 hours completing the final coat of the woodwork and a coat of white paint for the walls. Boy, it was hard work and I was completely drained. I missed the next day. On the third day I started painting the walls blue, intending to put in another long day and completing one coat of blue for the whole room that day itself.

Half way through painting the borders of the first wall, I left my painting mug and brush on the top of my step ladder and then shifted the stepladder to a new position! Negligence brought on by my hurry... The mug tipped over and before I knew it, I was splashed with paint from neck down! There were puddles on the floor, the wall was liberally spattered as was a newly white-painted drawer that had been calmly drying itself on the floor for the past two days.


I had to rush in to the attached bathroom and stand under the shower to wash out most of the paint (thank God it was an acrylic emulsion and not enamel paint) and then went to change downstairs leaving blue puddles everywhere.  But there was something else that was happening, which leads to my next lesson:

5. Never use any electronics near the painting area: What I didn't realize when the paint had fallen all over my front and when I stood under the shower was that I HAD MY PHONE IN MY APRON POCKET!!! On the previous days, I had always left it on the table or inside a cupboard while I worked. I was in the shower for almost a minute when I realized that my not-two-month-old phone was in the pocket where the paint had fallen the most and now I was pouring water over it too. The paint entered the head phone jack and screwed up the touch screen and voided my warranty too.

The next day I got it to a service center where the young technician had a good laugh at my expense ("You tried to paint a room by yourself?!") and made no promises to get it working other than to give it a thorough clean and see what happened. Fortunately, my phone was restored to its original health. The only casualty was an additional hybrid sim slot adapter that was damaged beyond repair. 

I did a lot of rethinking after the incident: I stopped work for two days. Then I decided that I would work alone if need be, take my time and finish only small, manageable areas in one day's work. And you can be sure that I left my phone outside the ROOM when I went painting again!!!

6. There will be splashes and blotches, however much you protect against them:


Looking back, I think it would have been wiser to invest in some plastic drop cloths to protect the floors and my craft table instead of using newspapers like I did. But the newspapers did a pretty good job too. 

As for my painting itself, there are lots of instances of blue encroaching on white and vice versa, but I am leaving them alone. I am leaving the pictures up here on a public blog because I want to counteract the ill-effects of people always feeding off the "perfect" pictures that are usually seen on the internet. I am a recovering perfectionist myself and I need to accept that I have done a good enough job as an amateur house painter.

7. Accept your limits and improvise when you can:  I decided early on that I would not be smoothing the walls with putty. I had seen how hard the painters had to work using it and then sanding it down and knew it was beyond my level of expertise. This meant that I had to get a very long-napped roller brush for the walls. (See, I had done my homework, reading up). But even that was not enough as I could see white spots all over even after several passes with the brush. 

So I took  a mug of blue paint and an old small paintbrush to touch up the parts where the roller brush or a regular brush couldn't reach on the pitted surface of the walls. I poked paint into the holes with a dabbing motion and got rid of the most glaring spots this way.

There were several things that I got right too. Learning to clean brushes properly after each day's work and doing it religiously means that if I ever feel like painting again, I have a good set of tools with me. 

Finally the room is clear and I have reorganized my craft supplies. Is my job over? Nope. There are several splotches on the floor and I have some cotton waste, turpentine, a scraper and some sand paper ready in a basket to do some splotch-removal a little at a time. Will I ever paint a room again? Yes, I will, provided I get in a professional to smooth the walls for me. Meanwhile I am more than ready to repaint cabinets or walls whenever the need arises.

I have a new respect for house painters. It's a tough job. The dust, the fumes and the sheer physical strength and endurance required to do the job well need to be experienced to be believed.

So what did my craft room look like before and how does it look now? Hmm... may be that will make another post!!!

Aug 5, 2010

Sewing curtains and an accidental paneer burji...

I am proud of what I have accomplished today before 11:30 - all the breakfast and school-going related hoohaa, three loads of laundry, almost all the dishes washed (the sink is not exactly shining in FlyLady lingo) and one more curtain done.

Yep, that's what I have been doing these days - getting simple curtain rods fixed, measuring and calculating till my poor head started aching and buying reams of cloth. The material you see below is the one I am using for my living room....


I'll post the full curtain pics once I have also got some lacy panels in too. I am stitching the current panels in simple tab-top (cafe curtain) style. For several days I put off stitching the curtains just because of the thought of stitching up the tabs. Cutting and hemming the panels are so easy compared to making the tabs. But then I hit upon the idea of assembly-line production. Instead of making them one by one, I made them together like so...


Thereafter it was pretty easy to secure the velcro and finish up. These seven tabs are what one of my curtain panels require. Are my curtains perfect? No. But I am making them and that makes me proud!

And now about the "accidental" paneer burji ...

We get our milk from our next-door neighbour who has a cow of her own. Every morning, we exchange an empty steel vessel for one filled with our daily 1.5 litres of fresh milk. For reasons unknown, for the past two days, our quota of milk got curdled while I was boiling it. Loath to throw it away, I found two white squares of mundu and hung up the curds to drain in them. The result was soft crumbly paneer/ cottage cheese. Yesterday evening I made burji with it and it was so tasty that my normally tomato-"allergic" husband and elder son asked for seconds. My son also put in a special request to include it in his lunch box today. I have used a lot of frozen paneer before - but have never got this wonderful flavor. I kind of felt like the boy who discovered roasted pig by accident in Charles Lamb's essay! Now if only I can find out how to curdle milk deliberately...

Here is a picture of my windchimy kitchen window. I got them from the Good Store near Kalewadi Phata in Pune, they came in absolutely gorgeous colors and were just about Rs. 50 each - so how could I pass them up? Yes, I am absolute fan of windchimes and can't have enough of them. And appropriately, we live in a very windy spot here. They make me smile every time my eyes fall on them and every time a wind blows... . Aren't these the little things that make life worth living?

3 Movie Reviews in 1: Nanpakal..., Romancham, and Pranaya Vilasam

1. Nanpakal Nerathu Mayakkam (Siesta) Lijo Jose Pellissery's movies are an acquired taste. Each movie is different and probably appeal ...